Pages

Showing posts with label tutorial. Show all posts

Thursday, April 19, 2012

The perfect classic french nails tutorial

Hello girls ..as you see one tutorial after another..yep...because I have missed a couple of days I decided to come back with a tutorial!And what tutorial is best then the perfect french nails
I know that are a lot of girls that love classic french nails..and you often comment on my french post that is perfect..Oh well today I will show you all how you can make it PERFECT!Anyone can..so let's get started!Enjoy!
Buna fetelor..dupa cum vedeti tutorial dupa tutorial..da..pt ca am lipsit casteva zile am decis sa revin in forta cu un tutorial..Si ce tutorial ar fi mai bun decat cel la manichiura frantuzeasca clasica..pentru ca stiu ca multe dintre voi adorati manichiura frantuzeasca clasica..si pentru ca am avut adesea comenturi la postarile de french in care fetele ma intrebau cum reusesc un french asa perfect fara benzi..ei bine astazi va voi arata si voua cum sa faceti un french PERECT.Toate dintre voi puteti!Asadar sper sa placa!


What I used


-matte white polish
-glittery polish for base
-detail brush
-nail polish remover


Step1
-Start from the middle of the nail and make a wide stripe like so
Step2
-go in the right side and carry on with the stripes
!!(remember that you can do the stripes directly with the brush of the white nail polish)


Step3
-
finish the french line
Step4
-you will need a small container to pour some nail polish remover
-here is the trick ..dip the detail brush in the container with nail polish remover..and then go along the smile line to make it perfect
Step5
-this is how it look after we correct it
-this a fake nail so this is why you may see it like so
Step6
-
apply a clear polish on the entire nail..


I love french nails..but I always use a french base because it will make our french more elegant..so for today I used a glittery polish for our base


Step7
-apply a coat of this polish on the entire nail surface including the french

This is how it looks with the glittery polish on top..More cute than the simple one no?


Hope you like it!!And hope you will try my method!
Kisses!

Sper sa va placa si sa incercati metoda mea!


If you have suggestions or questions you can contact me at kory_nails@yahoo.com

Friday, April 6, 2012

yellow&purple dotted nails+tutorials(long post)

Hello girls ..It's time for a tutorial..or two:) yep I decided to show you two ideas to do your nails the easy way:)
You know I did something like this design here but I decided to make different this time:) and to show you girls how to do it..so grab your nail polish and your dotting tools and let's get to work:)
Remember that you can use what color you like :)
Buna fetelor ..e timpul pt un nou tutorial sau chiar doua :)..Da am decis sa va arata doua idei foarte usoare de a va face unghiutele
Am facut ceva asemanator aici dar am decis sa il modific putin..si sa va arat cum se face:)..Asadar alegeti-va nuanta preferata si instrumentele de punctat :) si sa ne apucam de treaba


This is the design


What I used:

1.acrylic paint:white
2.silver glitter polish
3.yellow polish
4.dotting tool


Note* If you don't have dotting tool you can easy use a toothpick
If you don't have acrylic color you can use polish

Step 1

-from the cuticle draw a line like so:

Step2:
-then start to polish the nails in the color that you like
Step3:
-draw a line with silver glitter polish


Step 4:

-with the dotting tool start making white dots


Step 5

-make one line of dots..and then between the first line other white dots

-the first dot looks handicapped:)) because I was try to make the dot and the picture at the same time:))

Step 6:
-finish the entire nail with dots
Step 7:

Add top coat & you are done!


You can leave it like so..or you can try this other version!
Puteti f simplu sa lasati asa sau sa incercati varianta urmatoare!

I will show you how to do them in other color and with a cute ribbon on the ring finger:)
Acum o sa facem pe alta culoare..si cu o fundita pe unghiuta de la degetul inelar


This is how they look:)
(sis' nails)

I will show you how to do the ring finger nail:)


Step 1:

-
make with purple this time the nail(Remember you can do it in the color of your choice)

Step2:
-make the white dots

Step3:

-make the ribbon ,first the loops
Step4:
-make a dot in the middle of the ribbon


Step 5:
-outline the ribbon with purple acrylic paint
Step 6:
-make some lines in the ribbon:)
Step 7:

-add o rhinestone in the middle of the ribbon(this is optional)

Step8:
-Add top coat

The result!


Hope you enjoy this design and hope it was useful!
Sper ca va placa!


If you have suggestions or questions you can contact me at kory_nails@yahoo.com


Kisses have a great week-end:)


Thursday, December 1, 2011

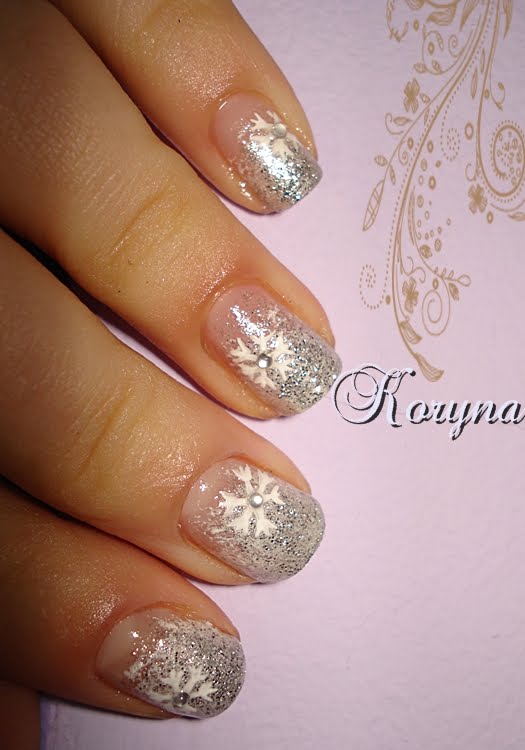
snowflakes..+tutorial

Hi girls I did my first snowflakes for this year..pff they are definitely not my best..I think the combination of colors is not right..hmm what do you think girls?:( these are my best pictures:( This will not last long on my nails because I don't like it:))
Buna fetelor..am zis sa fac si eu niste fulgi pe unghiile mele:)) primii pe anul acesta,clar nu e combinatie reusita,,voi ce parere aveti?
Abia am reusit sa scot o poza calumea..cu siguranta nu o sa stea mult pe unghiile mele acest model:))

Later edit: I decided to make a tutorial at this design..you cand do it on any background and colors that you want..I've changed the color of the snowflakes so they can be seen bether

Later edit:Am decis sa fac un tutorial la acest model ..puteti faceti ce fundal doriti si ce culoare vreti la fulgi..Am schimbat culoarea si la fulgi ca sa se poate vedea mai bine cand i-am facut


What I used:

-white acrilic paint
-sponge
-silver polish
-silver glitter
-silver rhinestones


Step 1
-make a white sponge background


Step 2
-over the white add some silver polish again with the sponge

Step 3
-draw a horizontal line with your detail brush

Step 4
make an x
Step 5
draw small v to the each end of the line

Step6(optional)
make another snowflake if you want

Step 7
-add rhinestones in the middle of the snowflakes

Step 9
-Add some silver glitter with your fan brush

Step 10
-add top coat


Kisses!!


Monday, October 24, 2011

dotted nails tutorial

Hi girls today will do a very easy design so grab your favorite polish and let's get started:D
I saw this design on my best friends nails and the I think why not try it..and show how easy it is!Because I wanted to make it even more easy I used only nail polish because I know you girls don't have acrilic colours..So you will see how easy is this design !Hope you will try this!
Buna fetelor astazi vom face un model f usor asa ca puneti mana pe ojele favorite si sa ne apucam de treaba:D
Am vazut acest model la prietena mea si am zis sa il incerc si eu si sa va arat cat de usor este!Pt ca am vrut sa va arat cat de usor este vom folosi doar oja pt ca stiu ca nu toate dintre voi aveti culori acrilice!Sper sa va placa!


This is the design in day light !


What we need:
-purple polish(swatch here)
- matte white polish
-dotting tool


Step 1:
-add two coats of purple polish
Step 2:
-put a drop of white polish on a plastic surface
Step 3:
-dip the dotting tool in the white polish
Step 4:
-make dots in a straight line starting from the left corner of the nail
Step 5:
-now make another line of dots betweeen the first line

Step 6:
-repeat this process on the entire nail surface

Step 7:
-let it dry and then apply top coat


The final result!


Remember that you can do this design in what colour you want

Kisses!!See you next time